Mid Century Modern Makeover: Sustainable Milk Paint
Disclosure: This blog contains affiliate links. I will receive a commission for items purchased through these links at no extra cost to you. I appreciate your support. Please read all labels and follow all manufacturer safety recommendations when working with paints, stains, and other equipment.
One of the things I love most about refinishing and flipping furniture is its sustainability. And today we’re talking all about it with this Mid Century Modern makeover! Not only does refinishing furniture help the environment and give life to pieces that were once destined for the dumpster, but you can also makeover your whole home WITHOUT breaking the bank.
Today, I’m taking it a step further. I’m using green paint and sealers that are natural, organic, and environmentally friendly.
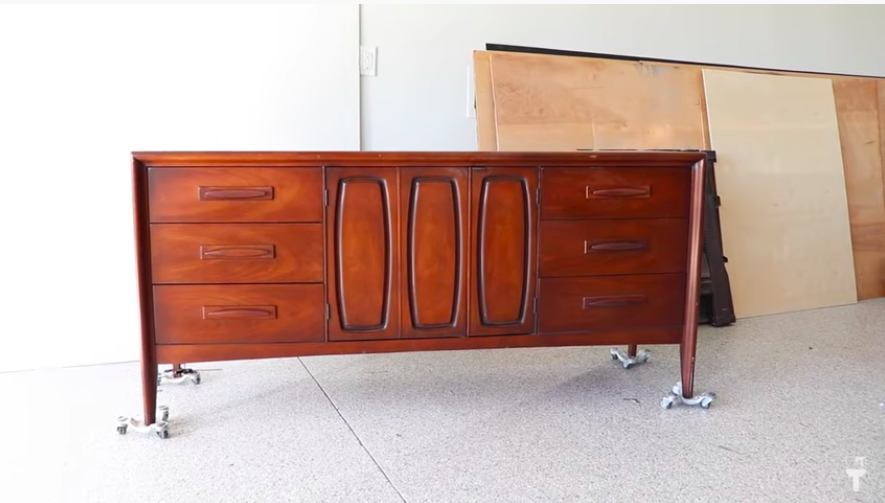
Before we jump into this makeover, just look at this beauty!
Materials for this MCM Project
Real Milk Paint Co Items > *Use CHRISTINA10 for 10% off*
Real Milk Paint Co Milk Paint Cheesecake
Real Milk Paint Co Milk Paint Arabian Night
Best of Zibra Paintbrush Kit *Use CHRISTINA10 for 10% off*
Surf Prep 3" x 4" Electric Ray *Use Code PRETTYDISTRESSED10 for 10% off *
Mid Century Modern Makeover Lowdown
I have to say, this was one of the most controversial pieces I’ve done. I bought this BEAUTIFUL Mid Century Modern piece on Facebook Marketplace for $400. Yes, I know that’s a lot of money, but this style is in high demand, and it’s an authentic vintage Broyhill Premier.
Another reason this became a controversial piece was because I painted it! Gah! I know that this type of vintage furniture is in high demand, but this isn’t a piece I am planning to flip for profit. This was solely for me, and I’m more than thrilled with how it turned out. In fact, I think it’s my favorite furniture makeover ever.
Again, in the spirit of Earth Day, I focused on keeping this makeover as clean and green as possible. I’ll be using Real Milk Paint Co. products that focus on sustainability and are made with organic ingredients. It’s safe for kids, pets, and the earth.
You’ve seen me use Real Milk Paint Co. before, and typically I’m using it to get a more chippy finish, but today I’m going for a smooth modern look, so I’ll be using some additional Milk Paint Co. products to accomplish this look.
Now that you’ve got this mid century modern makeover lowdown, let’s get to it.
Prep Work
Clean
Before I got started sanding, I did actually wipe this down with some vinegar and water. Typically I’d use TSP cleaner, but because I wanted to keep this as environmentally clean as possible, vinegar and water also do the trick.
Sand
After that dried, I grabbed my sander and a 120 grit sandpaper to strip back the finish on the top 3rd of the dresser. I grabbed my foam pad to get in the details and the rounded corners. And there were even details in the doors that I had to sand by hand to get it all.
After everything was stripped, I came back in with a 220 to smooth everything out. I did kick up a lot of dust with the sanding, so I did another round of cleaning with vinegar and water. Make sure after you clean you wipe down the piece with some fresh clean water.
Repair
There were a few fixes that I needed to address. There was some veneer damage on the drawers and one of the legs was cracked. And after sanding the piece, I noticed that the wood on the doors was a lighter different type of wood, so I’ll have to address that later.
I used some wood glue to close the crack in the leg and clamped it as it dried. Before it dried though, I wiped back the excess so that I didn’t have to sand it back down later.
Top ⅓ of Mid Century Modern Makeover
Creating Paint Wash with Real Milk Paint Co. - Cheesecake
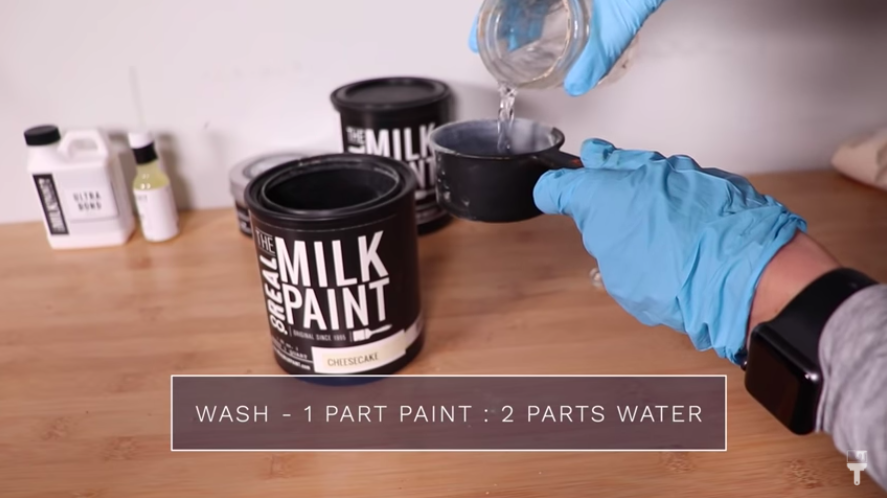
Okay. Now it's time for the fun part for the top of this piece. The wood is beautiful, but I want to give it a little bit more of a muted, modern feel. So I'm going to create a wash with my Real Milk Paint Co Milk Paint Cheesecake. I love the way this milk paint is packaged. The powder mix comes in a paint container and a marble to make it easy to mix.
The typical ratio from power to water is 1:1, but because I’m creating a wash, I’m going to be doing 2 parts water to 1 part powder because I want it to act as a stain. When you’re mixing your paint, make sure to use distilled water to help with adhesion.
After you get your power and water in the container, add the marble, put on the lid, and get your muscles ready because you’re going to give it a good shake for 5 minutes.
Let it sit for about 10-20 minutes to make sure all of those pigments are evenly distributed throughout the paint. Because of all the shaking, you’ll find that the paint can be pretty foamy. But no worries, Real Milk Paint Co. has an Anti Foam Agent that helps that. Add a couple of drops to your paint and stir it in.
Applying the Paint Wash
I am going to be applying this with my Zibra Paintbrush today. I’m using one of their new topcoat brushes and it’s 3 inches, so it will give me great coverage. I grabbed some clean cloths to have on hand to wipe back my wash.
Before I painted all of the wash on, I just tested a small section to make sure that I liked the color. I loved the way it was going so I was good to continue on!
After the testing though, you do want to make sure you are doing whole sections at a time and then wiping it back because you don’t want to get a streaky finish. Apply in the direction of the grain to get a more natural look. I also like to use clean rags to wipe the excess back with the grain as well.
Repeat this process until you get all surfaces covered. In my case, that was the whole top 3rd of my piece. I also wanted to note that on the rounded edges and trim pieces, I used the Zibra Round Brush.
At this point in the project, I’m panicking just a bit about the doors being a different and much lighter wood. But again, I’m just moving on and will figure that out later.
Bottom ⅔ of Mid Century Modern Makeover
Taping off with Painter’s Tape
And so now since I'm going to do my dip look, I need to tape this area off to get ready to do my paint on the lower ⅔.
So I'm just using a level and marking where that should go. And I'm using the drawers as my guide on the front. And then just wrapping that around the side too, and just getting my tape nice and level.
BONUS TIP: How to Get Crisp Paint Lines with Painter’s Tape
Here’s the secret…set your tape with the color that you are painting over. In this case for me, I grabbed my Cheesecake wash and painted it on the bottom part of the tape to get it wet and really lock it in. When you add your top paint color of this it’s going to result in a beautiful crisp line.
Quick Scuff Sand
After setting my tape, I went ahead and used fine sandpaper to scuff up the reminding portion that I’m about to paint. You all probably know that I’m a big fan of scuff sanding. It’s just that extra added insurance that helps your paint stick better. And if you're working with an old finish like this, it's always a good idea to scuff sand if you have the time and are willing to do it.
After that, I wiped back my dust and am getting ready to mix my second paint for the bottom ⅔ of this project.
Mix Real Milk Paint Co. - Arabian Nights
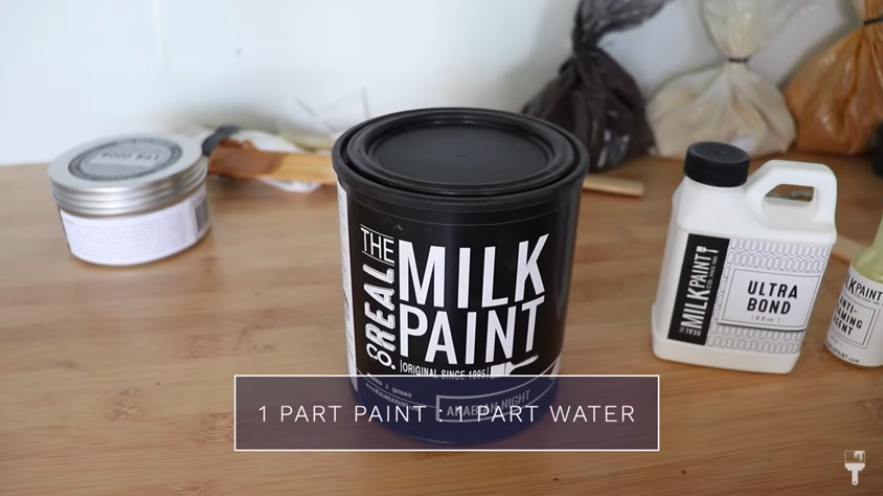
For the bottom portion, I decided to go with Real Milk Paint Co Milk Paint Arabian Night which is their darkest, deepest black. I mixed it the same way as I did the wash except for this is full paint coverage, so I did the typical 1:1 powder to water ratio.
Because I want a smooth finish, I used their Ultra Bond formula to help it adhere. I also used the anti-foam again as well.
Applying Milk Paint
For this bottom portion, I grabbed my Zibra Palm Pro because I just love the way it applies milk paint. It’s super easy to hold and it gets into the nooks and crannies really well.
Because the handles were also wood, I actually didn’t remove them to paint like I usually do. I might get some hate for that, but it worked for me so I went with it.
I did a second coat of paint on this piece and used my little artist brush to get into the nooks and crannies.
I did run into one problem, but nothing that couldn’t be fixed. When coming back to my dried paint, I noticed that the drawers had that chippiness that I talked about.
This could have happened for a number of reasons. Maybe it’s because I used vinegar and water rather than soap. It could have been because I didn’t give it a good enough scuff sanding. Regardless, it was only really bad on one drawer, but I got nervous and stripped then all back down to the raw wood.
And let me tell you, this milk paint LOVES raw wood. It went on so smoothly and beautifully.
Remove Painter’s Tape
To me, this is the most exciting part of the makeover. Haha. Peeling back that painter’s tape and revealing that beautiful, crisp line. Whew! It's a beauty.
Top Coat With Wood Wax
After the paint dried for 4 hours, I was ready to seal the piece keeping with the green/clean theme. I sealed this piece with Real Milk Paint Co Wood Wax which is also 100% natural. It’s made from plant-based materials and is eco-friendly and actually food safe.
I love this product because it’s going to give you that long-term water protection. It works really well on raw wood and deepened the walnut color on my piece.
I love applying this wax using old t-shirts. For the top lighter portion I used a white t-shirt and I used a black t-shirt for the bottom portion. A little bit goes a long way!
After it dries for about 10-15 minutes, you want to come back with a clean cloth and wipe away any excess.
Make sure to give your piece 5-7 days before using it, and 15-30 days to fully cure.
Final Fixes
Ok, so remember how I kept pushing off the door wood issue? It’s time to address that… and luckily I had a water-based walnut stain on hand, so I took my artist brush and painted it on to make it match the rest of the piece. It turned out great!
More About Sustainability
As I mentioned earlier, I really challenged myself on this piece to make it as sustainable and earth-friendly as possible. And what's awesome about this paint is, that not only is it environmentally friendly and non-toxic it's even food safe. It's 100% organic and it only has four ingredients.
I started furniture flipping to save money because I couldn't afford new pieces of furniture. And even though I paid $400 on this piece, the result is giving all the high-end West Elm vibes.
And let’s just be reminded of how sustainable refinishing furniture is. It’s so awesome to be able to take a piece that someone doesn’t want anymore and may be destined for the landfill, and repurpose it back to life again. We are not adding to the clutter of the world and we’re bringing the demand down for new pieces of furniture. I just really love that and wanted to highlight that today.
Mid Century Modern Makeover Reveal
So here is my sustainable and clean mid century modern makeover reveal. And I want to remind you that I created this piece for my home, and I’m SO in love with it. It’s going to look amazing in my family room as a media console. I’m going to be doing a lot of makeovers in my family room, so stay tuned!
If you want to see this makeover in action, check out my full tutorial on my YouTube channel.
I hope you love this makeover as much as I did!


